First, visit Fiverr.com
 Click on JOIN and create your account on Fiverr.
 Create your account step by step here, and then you will be on a page like this. This is my Fiverr account dashboard.
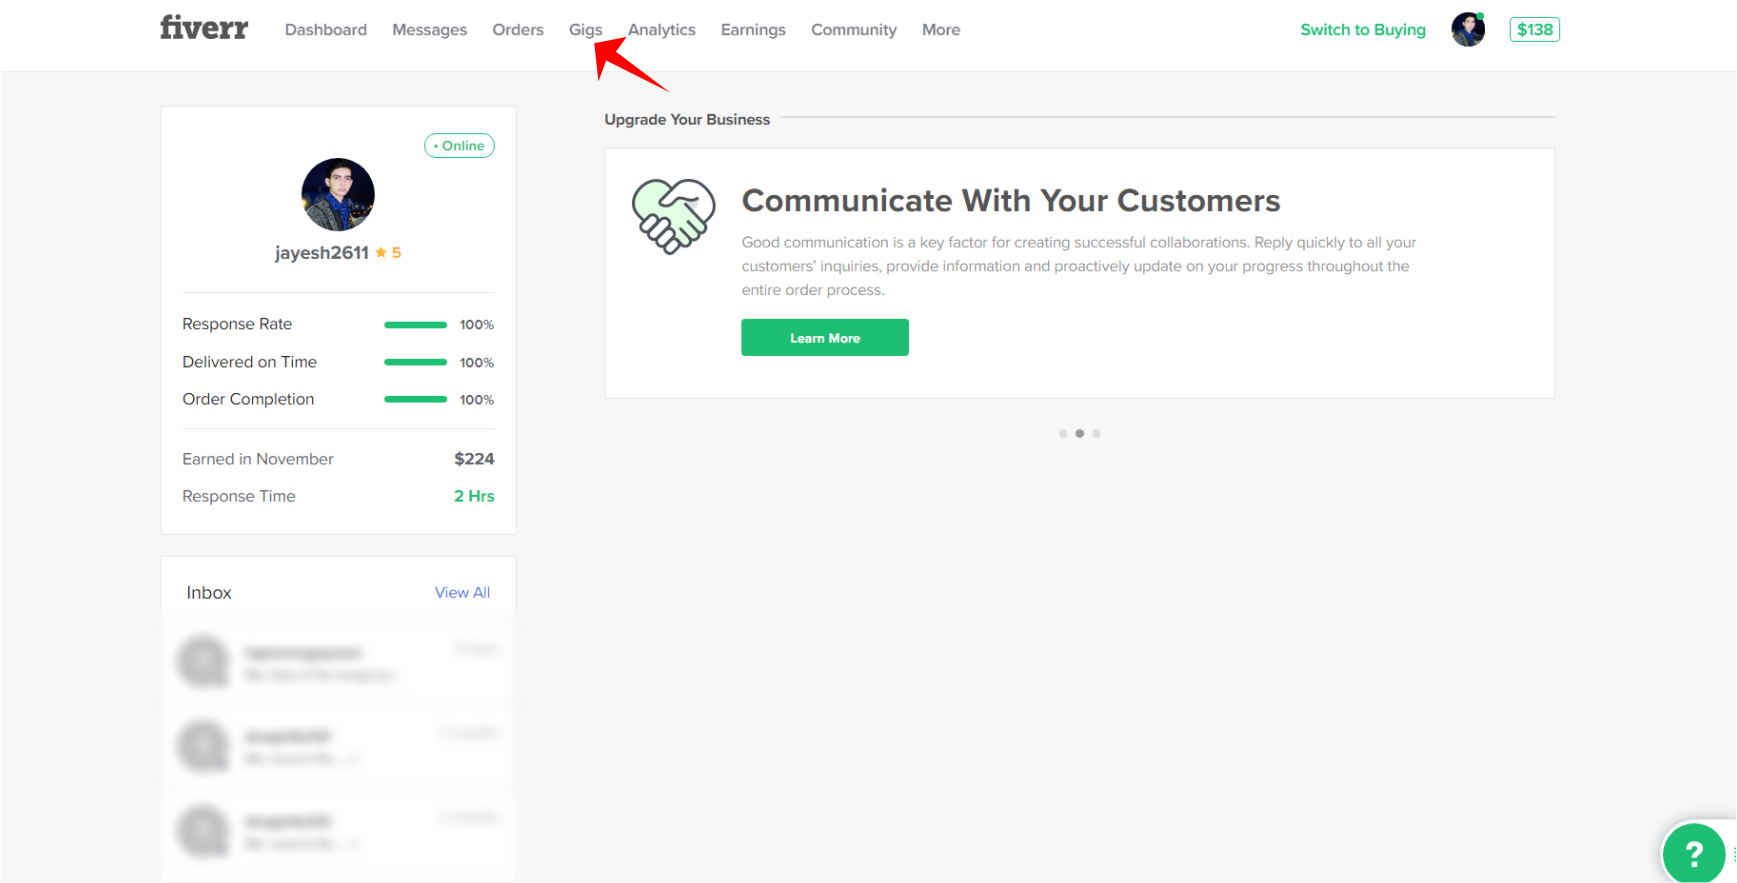 Click on “Gigs” and then on “Create a New GIG”
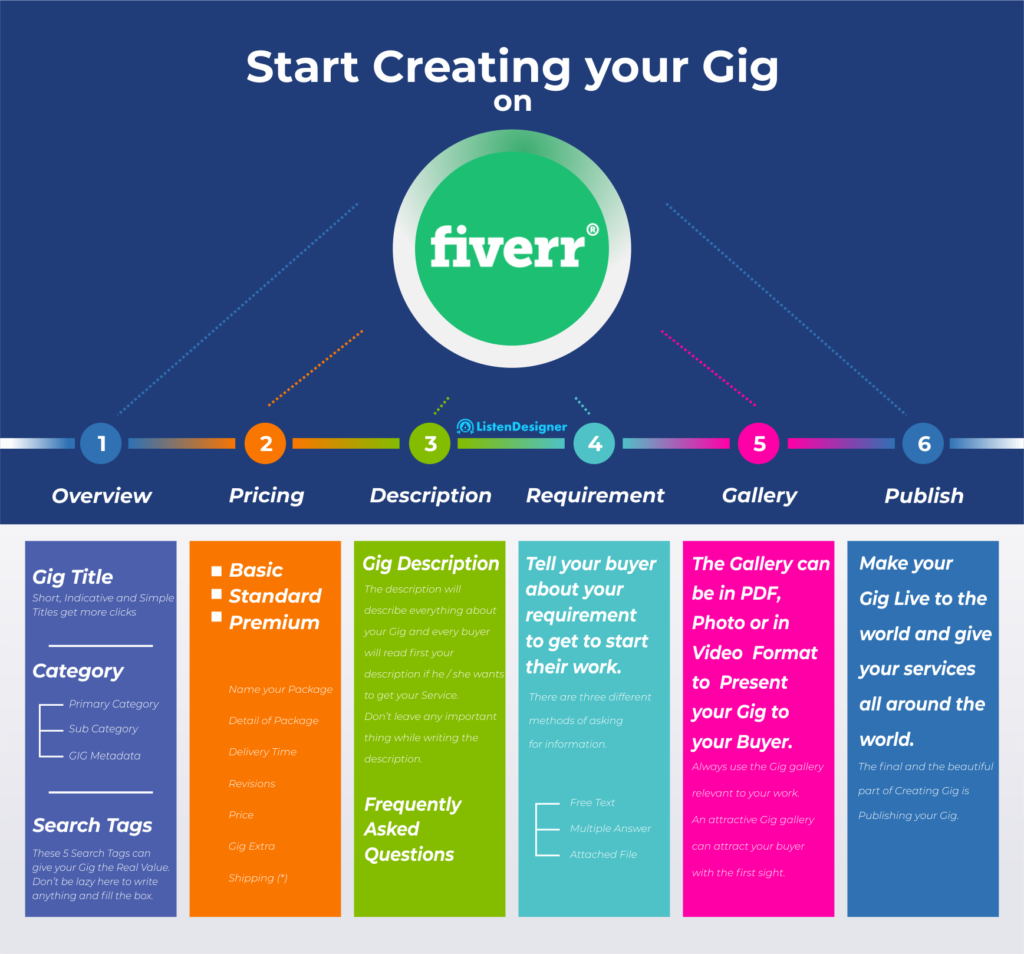
So now, from here you have to follow the 6 easy steps to create your Gig on Fiverr.
The first step of creating your gig on Fiverr.
– Write GIG TITLE: This title will show in the search results and everywhere. Write it attractive, short and buyer-friendly that inspire them to click on your title. 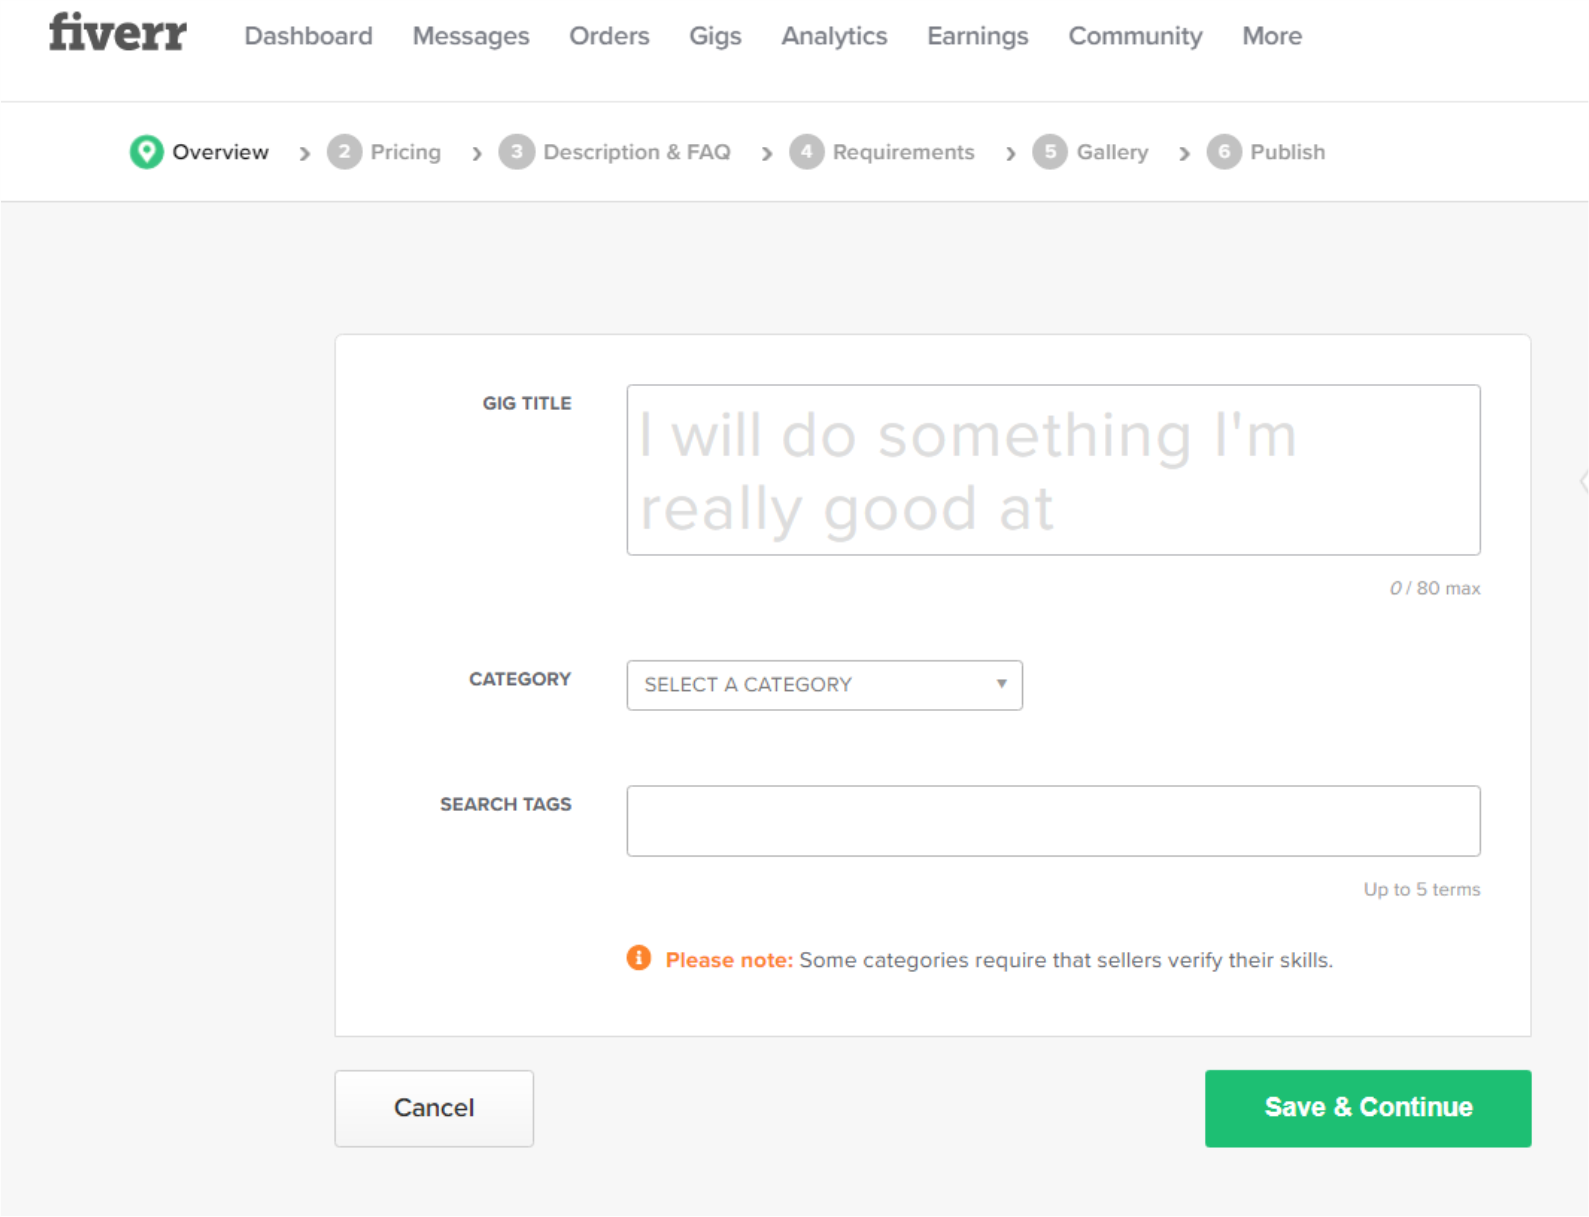
– Category & Metadata: Fiverr will available all of the different types of sub category as per the Primary category you choose. Like if you had chosen Graphic Design, the subcategory will be “Logo Design, Brand Style Guides, Game Designs, Graphic for Streamers etc., also if you had chosen Writing & Translation as your primary category, then the subcategory will be “Articles & Blog Posts, Resumes & Cover Letters, Proofreading & Editing etc.”
Fiverr have all pre-prepared subcategories and metadata as per the primary category. So here you will not be confused much more, because you will find easily the subcategories and metadata as per your gig niches.
Search Tags: Fiverr allow you to write 5 search tags, this search tags will affect your gig positions in organic search, so give all five proper search tags and don’t leave it blank after writing one or two tags.
Fill all of the details and click on Save and Continue.
Creating a gig on Fiverr? This is the second step in creating a Gig, Pricing.
When the time is to giving price tags to your Gig, be careful, because overpricing and underpricing both will harm your gig status in the sight of the client. Find the price of your services with all possibles ways you can do, then decide the price of your Gig.
How to fill the prices in your Fiverr gig?
The first green checked button you will see at the top right corner “3 Packages”

So first decide if your gig can be in 3 packages 1. Basic, Standard & Premium? If you can give your services within 3 packages, lets left it on, and if not? then uncheck it, after unchecking, your gig will have only one pricing plan.
Now first fill the Basic plan with #1. The name of your package #2. Then describe the details of your basic plans #3. Set the delivery time, the minimum time is 1 day and the maximum is 29 days. #4 Then set how many revisions you can allow your client within the plan. This can be 0 and unlimited as per your choice.
After it, all other options will be as per the gig types, if your gig is about creating a logo then the option will be here like “Source file, Logo Transparency, 3d mockup, stationery designs, etc.”
And the last option will be Price, choose the price of your basic plan, the price of the basic plan will be lowest than other plans.
My Gig Extra:
Extra Fast Delivery – If you can do your work faster than you describe in your gig, you can charge for it and can add it in your gig as Extra Fast Delivery.
Additional Revisions – If your client is not satisfied with the desire revisions, you can add some additional revisions to it to satisfy your clients.
There’s also more other options available for it as per the type of the gig you are creating, you can choose them per your need.