How to Create a gig on Fiverr? - 6 Easy Steps

So, you wanna learn how to create a gig on Fiverr? Fiverr is the most favorite choice of any freelancer, with its fastest joining, easiest steps to create a gig, getting clients, and earning money.
Creating a gig on Fiverr is the easiest task, you can create a gig on Fiverr in just 10 minutes, but the quite difficult thing is that you have to get clients and earning money on Fiverr.
In my other post, you can easily learn to Get clients on your Fiverr gig with the simple steps.
Now, on this post, I will completely post the steps of creating a gig on Fiverr with instead of doing SEO of your Fiverr gig.
So, the first step of creating a gig is to find your Ideal services in which you are master and you can complete within time without any hustle.
Let’s you decided that you are professional in creating mobile apps. So, you wanna give freelance services on Fiverr by creating mobile apps for someones. Then you can give your services on Fiverr of creating mobile apps to the people who want these types of services.
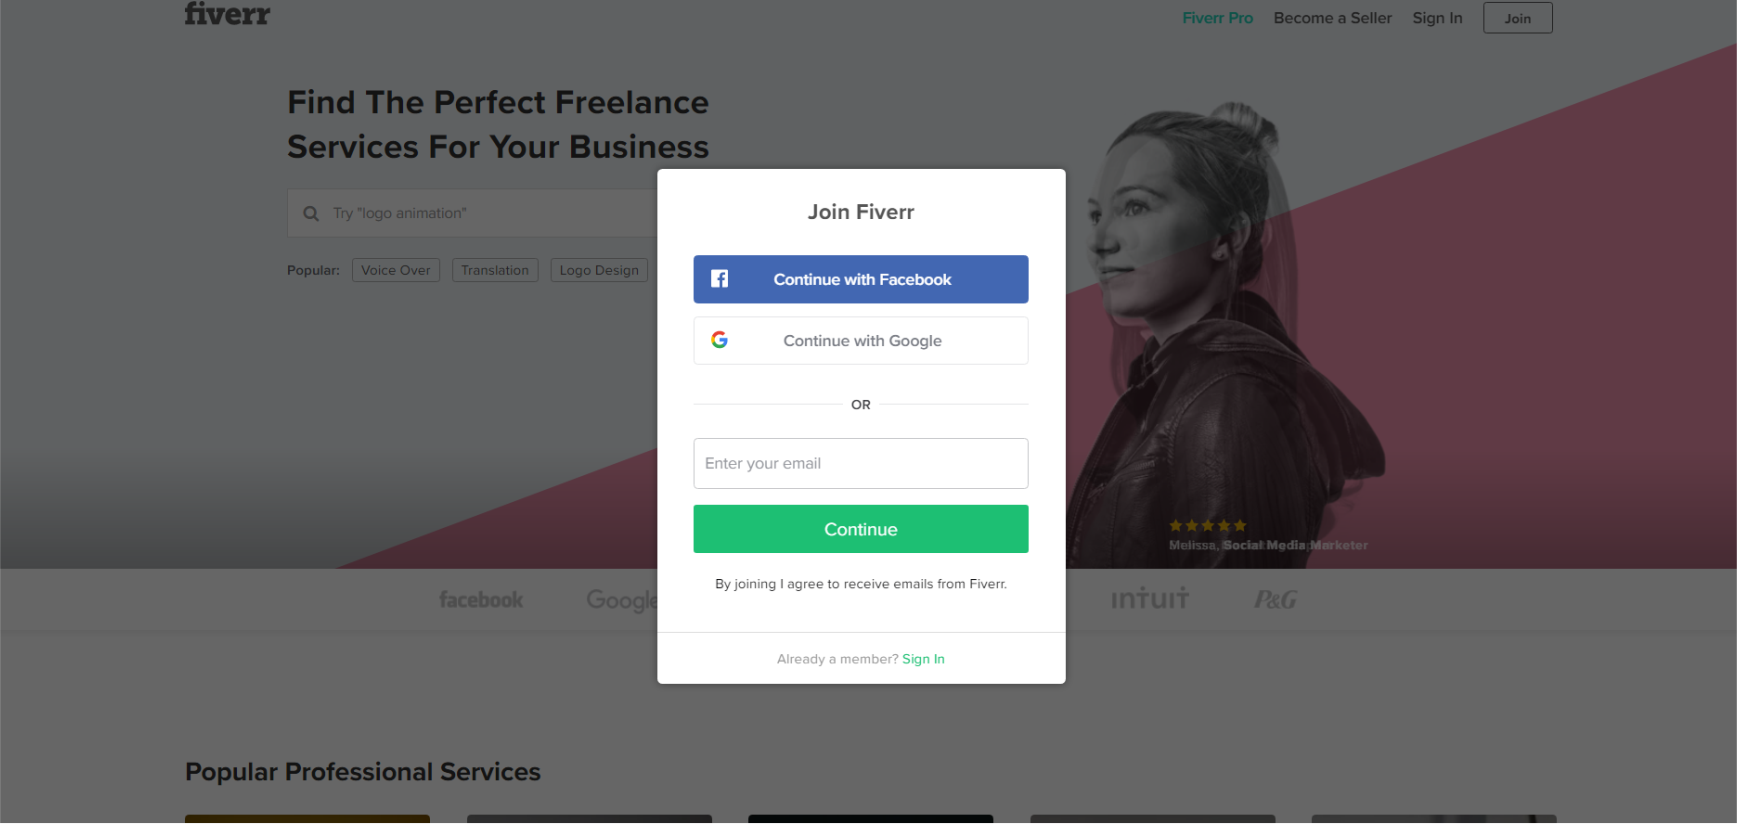
First, visit Fiverr.com
 Click on JOIN and create your account on Fiverr.
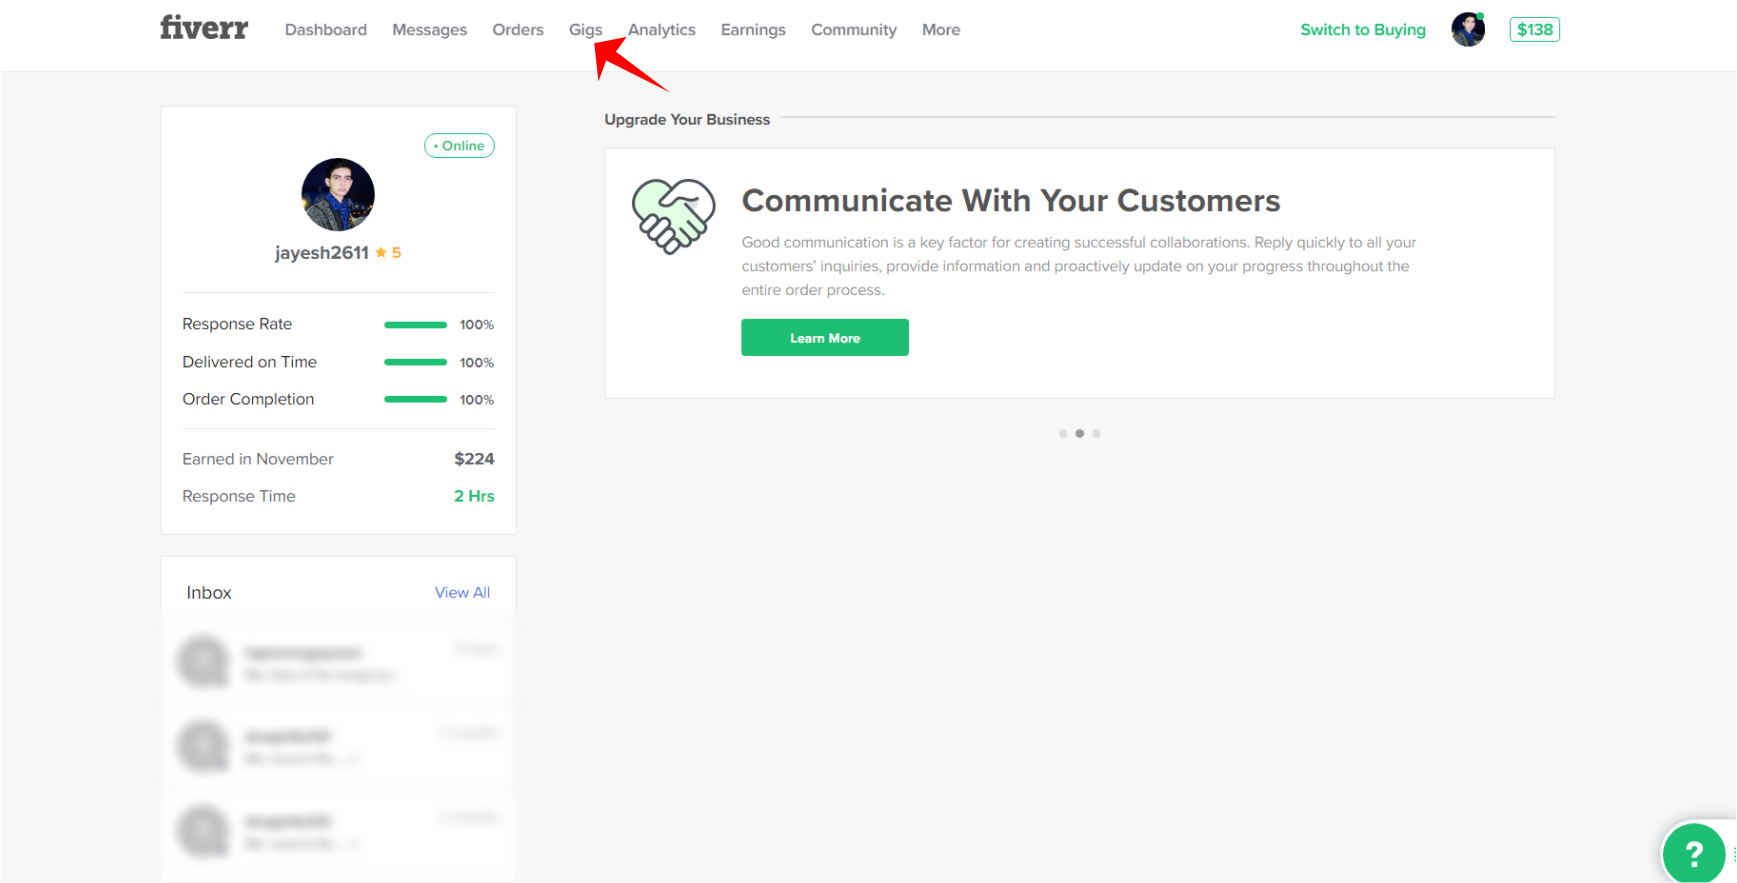
 Create your account step by step here, and then you will be on a page like this. This is my Fiverr account dashboard.
 Click on “Gigs” and then on “Create a New GIG”
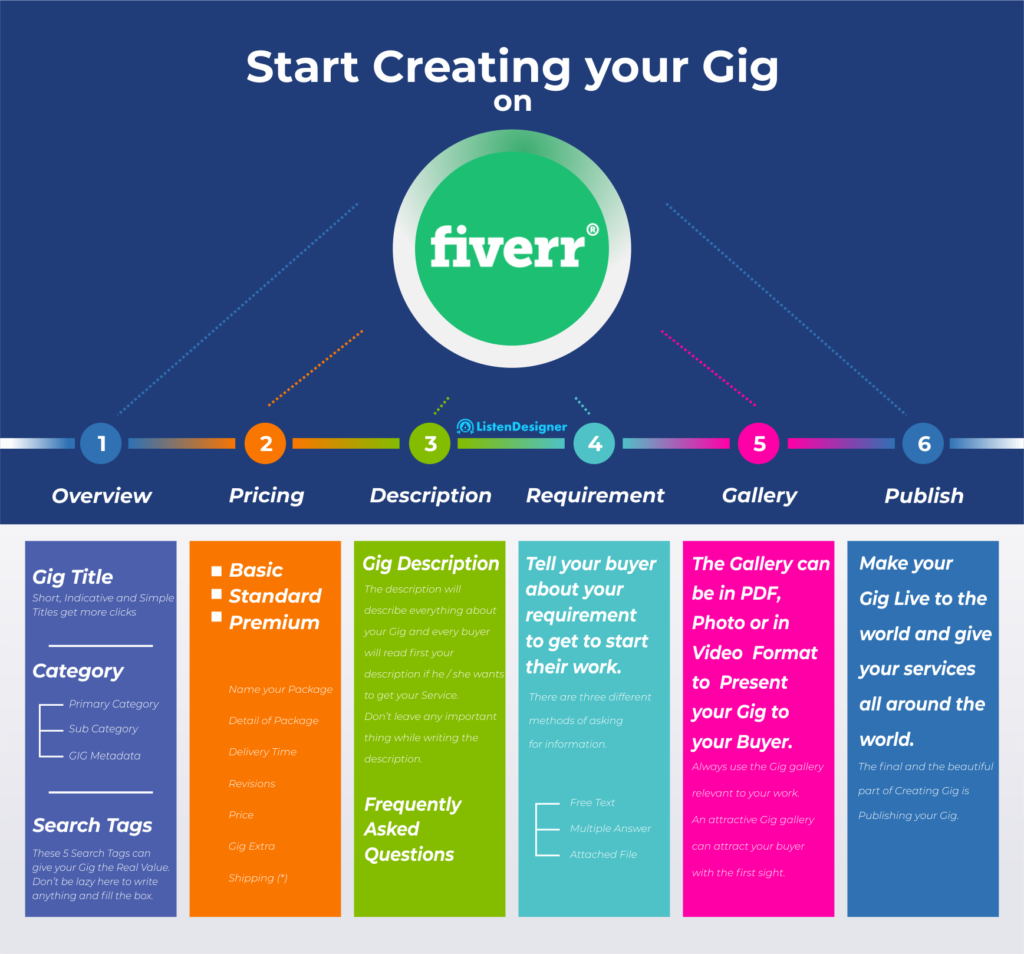
So now, from here you have to follow the 6 easy steps to create your Gig on Fiverr.
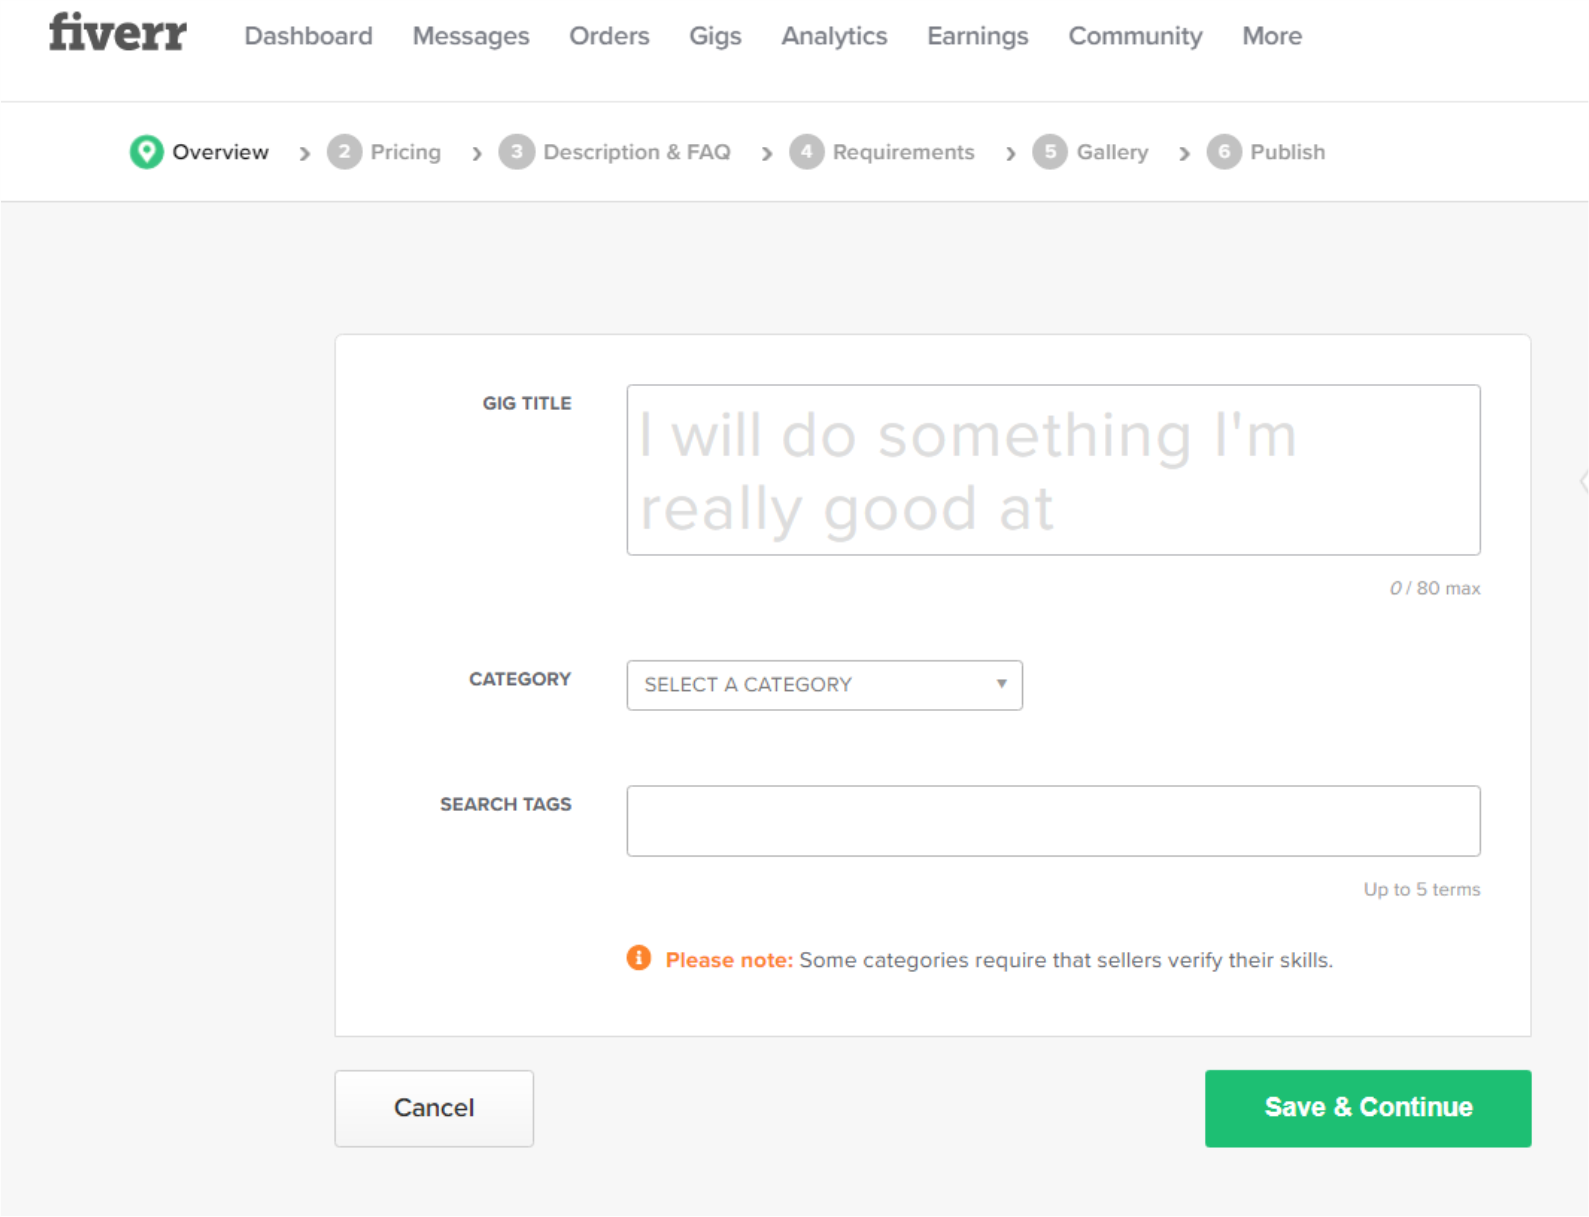
1. OVERVIEW
The first step of creating your gig on Fiverr.
– Write GIG TITLE: This title will show in the search results and everywhere. Write it attractive, short and buyer-friendly that inspire them to click on your title. 
– Category & Metadata: Fiverr will available all of the different types of sub category as per the Primary category you choose. Like if you had chosen Graphic Design, the subcategory will be “Logo Design, Brand Style Guides, Game Designs, Graphic for Streamers etc., also if you had chosen Writing & Translation as your primary category, then the subcategory will be “Articles & Blog Posts, Resumes & Cover Letters, Proofreading & Editing etc.”
Fiverr have all pre-prepared subcategories and metadata as per the primary category. So here you will not be confused much more, because you will find easily the subcategories and metadata as per your gig niches.
Search Tags: Fiverr allow you to write 5 search tags, this search tags will affect your gig positions in organic search, so give all five proper search tags and don’t leave it blank after writing one or two tags.
Fill all of the details and click on Save and Continue.
2. PRICING YOUR GIG
Creating a gig on Fiverr? This is the second step in creating a Gig, Pricing.
When the time is to giving price tags to your Gig, be careful, because overpricing and underpricing both will harm your gig status in the sight of the client. Find the price of your services with all possibles ways you can do, then decide the price of your Gig.
How to fill the prices in your Fiverr gig?
The first green checked button you will see at the top right corner “3 Packages”

So first decide if your gig can be in 3 packages 1. Basic, Standard & Premium? If you can give your services within 3 packages, lets left it on, and if not? then uncheck it, after unchecking, your gig will have only one pricing plan.
Now first fill the Basic plan with #1. The name of your package #2. Then describe the details of your basic plans #3. Set the delivery time, the minimum time is 1 day and the maximum is 29 days. #4 Then set how many revisions you can allow your client within the plan. This can be 0 and unlimited as per your choice.
After it, all other options will be as per the gig types, if your gig is about creating a logo then the option will be here like “Source file, Logo Transparency, 3d mockup, stationery designs, etc.”
And the last option will be Price, choose the price of your basic plan, the price of the basic plan will be lowest than other plans.
My Gig Extra:
Extra Fast Delivery – If you can do your work faster than you describe in your gig, you can charge for it and can add it in your gig as Extra Fast Delivery.
Additional Revisions – If your client is not satisfied with the desire revisions, you can add some additional revisions to it to satisfy your clients.
There’s also more other options available for it as per the type of the gig you are creating, you can choose them per your need.
3. DESCRIPTION & FAQ
The description is a well-written explanation of your gig. Try to cover almost everything with detailed about your gig in the description so the buyer can easily understand what they can get by purchasing your gig and if your gig can meet their needs.
You have to write your description from 120 to 1200 characters.
Frequently Asked Questions are the questions that are most commonly asked questions, you have to ask the question and then also you have to answer them.
If you don’t get any idea about the question and answer then leave it blank. You can edit your gig after getting many orders, then you will realize the what are the questions are mostly asked by the buyers to you, and then you can add the questions in it.
4. REQUIREMENTS
In this step, you can indicate your buyers with your requirements before starting their work, so that they can provide you what you want before placing the order.
There are three different methods for asking the buyer for your requirements.
1. Free Text – In the free text you have to just write what you need as a plain text.
2. Multiple answers – If you use multiple answers for your requirements it will visible in bullets or number form of all your needs one by one.
3. Attached file – If you are working like editing someone’s photo, you have to need the photo of the buyer to edit it, then you have to click on the attached file to add your requirements so that the buyer can add their file before placing the order.
5. GALLERY
Time to represent your services to the world. You can choose your file as per your service.
You can use photos, videos or PDF documents.
For photos: Use at least 550 x 370 pixels in landscape format to looks proper in your gig gallery.
For videos: Videos are far better than photos, use a better and high-quality video that can well describe your services. You have to upload the video up to 50 MB and less than 70 seconds.
For PDF: You can choose the PDF option if the PDF can clarify everything about your services.
6. PUBLISH YOUR GIG
The last step of creating a gig is, publishing your Gig to the world. Don’t think too much before publishing your gig if you had already created it well.
Click on PUBLISH GIG and you did it. Now wait for the clients and enjoy your freelancing on Fiverr.
You’re learned here how to create a gig on Fiverr, now if you want to know everything about how to create a gig on Fiverr and how to get clients on it, how to do proper SEO to visible it on Fiverr search than checking another post on our site.
